Do you wish you could take amazing vacation photographs without having to lug around a big DSLR camera?
I have some tips to share that can help!
Maybe you didn't know this about me, but before I was a jewelry artist, I used to be a professional photographer.
I photographed weddings, family portraits, children, high school seniors and anything else you can think of.
Once I started having children, I found that my heart was torn between being away from home shooting all day weddings and being a mom to my new son.
Long story short... the kid won the contest.
My husband actually took over the photography studio I started and now he shoots as his full time job.
People that know this fact often ask me about which camera to buy, what lenses they need and many other photography related questions. In fact, just the other day, I met up with a friend for lunch and to talk about how she can improve her camera skills. I thought you would be interested in what I shared with her.
You might be surprised to know that almost all of my jewelry photographs are done on my iPhone and edited with apps while I wait in the carpool line to pick up my kids from school.
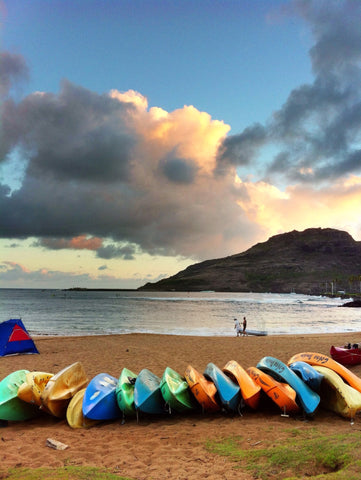
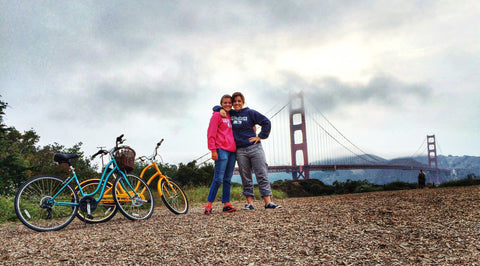
You might also be surprised to know that while I have at my disposal top of the line professional camera gear, I often choose to shoot with my iPhone. Even on vacation. Even on vacation to beautiful places like Hawaii or San Francisco.
Why?
Because I am lazy.
I'm kidding. I'm not even a little bit lazy actually.
The real reason is that my iPhone is always with me.
It fits in my back pocket. I can shoot a photo and edit that photo in the space of 5 minutes and then, if I want to, I can share my masterpiece with the world via Instagram. Or, if it's of my kids and my teenage sons forbid me to post the picture, I can just text it to my mom.
I'm not saying there isn't a place for my Nikon DSLR. Because there is. But what I am saying is that I'm headed to Paris this week and I am not planning to lug around my big camera. Instead, I am planning to ride a bicycle to Monet's Garden in Giverny, and go to the top of the Eiffel Tower and wander around museums and go on a fancy dinner cruise on the Siene River all without being encumbered by a big camera and a bag full of lenses.
I will be armed with my iPhone and the following tips:
- Start with a clean lens. This might seem obvious, but so many people don't realize this is the cause of blurry or cloudy photos. Wipe both the front and rear cameras with a cloth (or the bottom of your shirt) Fingerprints happen all the time, so do this frequently.
- Touch your screen to focus on what you’re shooting. Did you know that you can touch your subject on your iPhone’s screen to change the focus point? If you’re taking pictures of people, it works the same way. Touch your subjects face and that is what will be the focus point.
-
Use the exposure adjustment feature. When you touch your focus point, you will notice that a little sun appears to the right of the spot you touched. Touch the sun, and it becomes a slider that if you move up, will lighten your picture. Move it down to darken.
- Don’t Zoom – Photos will turn out much better if you do not use the zoom feature. Instead, get as close to your subject as possible or crop the photo after taking it.
-
Look for good light. Natural light is always best. Look for directional light. Look for interesting light. For people, look for open shade or directional light for the face.
-
Use the Composition Grid and try to use one or more of the following: (to turn on the grid go to settings>photos & camera>grid)
Quadrants - Divide your photo up visually into four equal quadrants and place the subject within one of them.
Leading lines - Any lines in your photo should direct the eye toward your subject rather than away.
Negative space - Leave some empty space within the frame to give the eye a place to rest. Negative space can be used to isolate your subject.
Foreground adds depth - Placing things in the foreground adds depth and interest to your photo... things like tree branches, flowers or other people.
- Use Snapseed or another photo editing app to edit every photo you take. The Snapseed app is free and will polish up any photo you take. You can make color corrections, lighten and darken, sharpen, crop, add contrast, remove blemishes or unwanted elements, etc. It makes a HUGE difference. If you have another favorite photo editor, by all means use that, but Snapseed is superior to the photo editor that comes on your phone and it’s easy to use.
- Get the Pro HDR app Just do it. If you are taking scenic photos on vacation, you need this app. It's the best $2 you'll ever spend. This HDR app takes two photos one right after the other... one exposes for the highlights, one exposes for the lowlights, then it merges the two giving you the perfectly exposed picture just like your eyes saw it. The only down side is that you have to hold still while it takes the two photos and it is not good for shooting people because people move too much.
- Don't just shoot the obvious. Look for little details, tell a story with your images, shoot local people, try different angles, etc.
I hope you found these tips useful. I also hope you will follow along on Instagram to see how I use these techniques myself to shoot everything from vacation photos, to pics for my website. My user name is @kellyanniejewelry
For anyone that is interested in checking out other photo related apps I love, here's a list:
-camera sharp
-slow shutter
-lens light
-image blender
-prisma
-retouch
-anticrop
Happy shooting!
Thanks for introducing me to Snapseed! I use my iPhone to take pics for my Etsy shop and then edit them in Photoshop. Snapseed is going to save me so much time! :)